Post summary: Use already created Page Objects and build up test framework.
References
This post is part of Automation of WPF applications with Telerik Testing Framework and TestStack White series. The sample application can be found in GitHub SampleApp repository.
Page Objects holder
Below is App.cs which is a representation of application under test.
using ArtOfTest.WebAii.Wpf;
using White.Core;
using White.Core.UIItems.WindowItems;

namespace SampleApp.Tests.Framework.Elements
{
	public class App
	{
		public WpfApplication ApplicationWebAii { get; private set; }
		public Application ApplicationWhite { get; private set; }

		public App(WpfApplication webAiiApp, Application whiteApp)
		{
			ApplicationWebAii = webAiiApp;
			ApplicationWhite = whiteApp;
		}

		public MainWindow MainWindow
		{
			get
			{
				return new MainWindow(ApplicationWebAii
					.WaitForWindow(MainWindow.WINDOW_NAME).Find);
			}
		}

		public OpenFile OpenFile
		{
			get
			{
				return new OpenFile(GetWindowByName("Open"));
			}
		}

		public MessageBox MessageBox
		{
			get
			{
				return new MessageBox(GetWindowByName(""));
			}
		}

		private Window GetWindowByName(string windowName)
		{
			// Workaround as method GetWindow(string title) is not working
			foreach (Window window in ApplicationWhite.GetWindows())
			{
				if (windowName.Equals(window.Name))
				{
					return window;
				}
			}
			return null;
		}
	}
}
The constructor takes an instance of Telerik Testing Framework’s application (WpfApplication) and TestStack White’s application (Application). Those are stored in the App instance.
Access the Page Objects
Each window in a real application is represented by a property in the App class. When accessed a new object of this page object class is created and its elements can be accessed.
WPF page objects require VisualFind in order to be instantiated. It is obtained by first locating the window with Telerik’s
public WpfWindow WaitForWindow(string caption);
From the located window we need only the VisualFind which is used internally to locate elements on that particular window.
WinForms page objects require White’s Window instance in order to be instantiated. The window is located by
public virtual Window GetWindow(string title);
I found this method not always working so I’ve made a workaround method
private Window GetWindowByName(string windowName);
New Page Objects vs. Cached Page Objects
In the example above every time, an action is required a new page object is instantiated. In some cases instantiating the object may require longer time or you might need some properties in this object preserved during tests. In such cases, you may use Singleton design pattern and instantiate only one object.
private MessageBox messageBox = null;
public MessageBox MessageBox
{
	get
	{
		if (messageBox == null)
		{
			messageBox = new MessageBox(GetWindowByName(""));
		}
		return messageBox;
	}
}
Both approaches have pros and cons. In case of new page object, you always work with a fresh instance without any previous state saved. This might require more time to instantiate the objects and you are not able to save previous states. Cached objects may be much faster as a performance but having internal state may lead to unexpected bugs in your automation.
Base test
Finally to make all work we need an instance of App. The instance is created in BaseTest.cs class.
using ArtOfTest.WebAii.Core;
using SampleApp.Tests.Framework.Elements;
using White.Core;

namespace SampleApp.Tests.Framework.Tests
{
	public class BaseTest
	{
		protected App App { get; set; }
		private string applicationPath =
			"C:\\SampleApp\\SampleApp\\bin\\Debug\\SampleApp.exe";

		protected void Start()
		{
			if (App == null)
			{
				Application appWhite = Application.Launch(applicationPath);
				Manager manager = new Manager(false);
				manager.Start();
				App = new App(
					manager.ConnectToApplication(appWhite.Process), appWhite);
			}
		}

		protected void Stop()
		{
			if (App != null && App.ApplicationWhite != null)
			{
				App.ApplicationWhite.Kill();
			}
			App = null;
		}
	}
}
All tests inherit from the base test class. Initialise and clean up code is added in the base test. In our case Start() method is the initializer. It must be called in order to instantiate App class. App property is protected so every extending class has access to it.
Initialise the frameworks
In order to start the application under test, we need the full path to the exe file. In this example, this is hardcoded but in real life, it will be configurable. Start the application with White:
public static Application Launch(string executable);
Once started then connect to it with Telerik framework by creating a Manager and use its
public WpfApplication ConnectToApplication(Process proc, string pid = null);
The process is obtained out of White Application.Process property. Opposite launch order is not working. White is not able to Attach to running process.
Use page objects
Once Start() method is called, the application under test is started and both frameworks are connected to it you can simply do in your test:
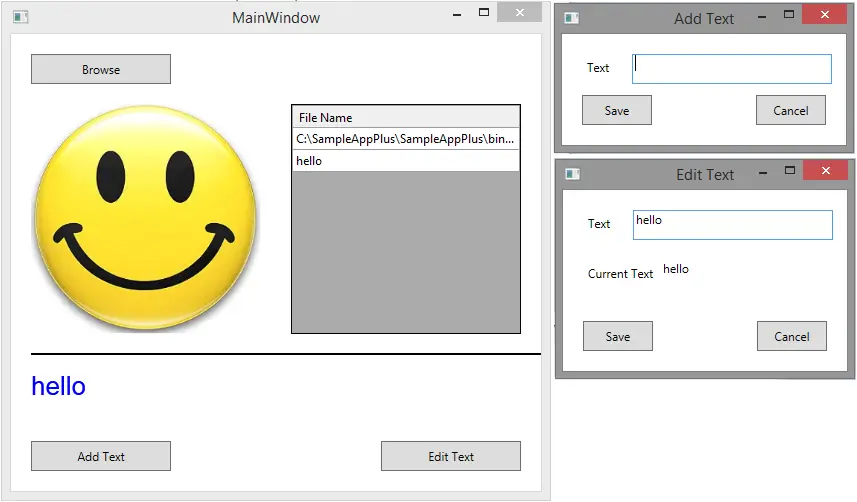
App.MainWindow.ClickBrowseButton();
This will find and create a new instance of MainWindow and then it will find and click Browse button. Your framework defines the actions on elements which are later used in actual tests. Once all the work on framework has been done it is that simple to build your tests.
Clean up
Stop() method is called at the end of the test in order to close the application under test by killing the underlying process.
The tests
This is unit test created with MS Unit Testing Framework in order to demonstrate real testing on the application.
using Microsoft.VisualStudio.TestTools.UnitTesting;
using SampleApp.Tests.Framework.Tests;

namespace SampleApp.Tests
{
    [TestClass]
    public class UnitTest1 : BaseTest
    {
		[TestInitialize]
		public void Initialise()
		{
			Start();
		}

		[TestMethod]
		public void OpenFile_OnCancel_GivesMessage()
		{
			App.MainWindow.ClickBrowseButton();
			App.OpenFile.ClickCancelButton();
			Assert.AreEqual("Problem occured, try again later",
				App.MessageBox.GetText());
			App.MessageBox.ClickOkButton();
		}

		[TestMethod]
		public void OpenFile_OnAttachFile_GivesMessageAndFileIsShown()
		{
			string filePath = @"C:\SampleApp\SampleApp\bin\Debug\HappyFace.jpg";
			App.MainWindow.ClickBrowseButton();
			App.OpenFile.EnterFileName(filePath);
			App.OpenFile.ClickOpenButton();
			Assert.AreEqual("Successfully done", App.MessageBox.GetText());
			App.MessageBox.ClickOkButton();
			Assert.AreEqual(filePath, App.MainWindow.GetFilePathAtIndex(1));
		}

		[TestCleanup]
		public void CleanUp()
		{
			Stop();
		}
    }
}
Unit testing frameworks
Unit testing frameworks are designed to run tests in random order. Before each test method annotated with [TestInitialize] is run. In our case application is started. After each test method annotated with [TestCleanup] is run. In our case application is stopped. For this simple application running tests with a unit testing framework is OK. We are not doing unit tests but functional once. So for bigger and more complex tests unit testing frameworks are not very convenient. I’ve created very simple tests runner. This post describing the need of such tests runner.
This post shows how to build up the framework based on page objects. Next post is WPF automation – running the tests.
Related Posts