Ansible playbook example and how to provision it in Vagrant
The code below can be found in GitHub sample-dropwizard-rest-stub repository in Vagrantfile-ansible and playbook.yml files. Since Vagrant requires to have only one Vagrantfile if you want to run this example you have to rename Vagrantfile-ansible to Vagrantfile then run Vagrant commands described at the end of this post. This post is part of Vagrant series. All of other Vagrant related posts, as well as more theoretical information what is Vagrant and why to use it, can be found in What is Vagrant and why to use it post. I have used Ansible and Chef for deployments, unlike Chef, Ansible can easily be demonstrated in an offline demo. In order to test your Ansible playbook, it can be easily provisioned into Vagrant. This will be demonstrated into the current post.
Ansible introduction
Ansible is a tool used for managing repetitive IT tasks, such as deployments, infrastructure management, etc. It connects to the machines it has to configure via SSH. Commands are written in a Playbook, which can be saved under version control. The playbook contains some actions that have to be performed, those actions are described in YAML format using so-called modules. A module is a small step that performs a certain action, such as copy file, execute a bash command, etc. Full list of modules can be found in Ansible modules index. Playbooks can be reused, which gives flexibility. Full Ansible documentation can be found in Ansible user guide. If things become way too big to manage, there is Ansible Tower which can centrally control all your Ansible environment.Example Playbook
In Run Dropwizard Java application on Vagrant post, I have shown how to deploy a single fat JAR Java service in Vagrant. The commands from that post are translated to an Ansible Playbook and service is deployed with Ansible.---
- name: Deploy 'dropwizard-rest-stub'
hosts: all
vars:
service_file: /etc/init.d/dropwizard
tasks:
- name: Check if service is installed
stat:
path: '{{ service_file }}'
register: service_result
- name: Stop service
service:
name: dropwizard
state: stopped
use: service
when: service_result.stat.exists == True
- name: Install Java 8
yum:
name: java-1.8.0-openjdk-devel
- name: Create folders
file:
path: /var/dropwizard-rest-stub/logs
state: directory
- name: Copy JAR file
copy:
src: target/sample-dropwizard-rest-stub-1.0-SNAPSHOT.jar
dest: /var/dropwizard-rest-stub/dropwizard-rest-stub.jar
- name: Copy configuration file
copy:
src: config-vagrant.yml
dest: /var/dropwizard-rest-stub/config.yml
- name: Copy service file
copy:
src: linux_service_file
dest: '{{ service_file }}'
- name: Fix service file because of Windows new lines
replace:
path: '{{ service_file }}'
regexp: '\r'
replace: ''
- name: Make service file executable
file:
path: '{{ service_file }}'
mode: 755
- name: Reload services
systemd:
daemon_reload: yes
- name: Start service
service:
name: dropwizard
state: started
use: service
I will not go into details about the playbook, each step is self-explanatory. The service file path is declared as a service_file variable, which is later used as ’{{ service_file }}’. Service has to be shut down in case the playbook is run for an upgrade, this is why a conditional stat module task is used. It checks if the service file exists and if it does then service task tries to stop the service. Then playbook installs Java 8, copies the JAR and configurations, creates the service and starts it. Important here in service task is use: service, otherwise it will try the default systemd which will produce an error.
Run the Playbook
Running the Playbook is a task that requires more effort. What happens usually, is that you have boxes with SSH installed which are ready to get configured with Ansible. In this demo, you have to make this box on your own. I use Oracle's VirtualBox. CentOS 7 image can be downloaded from CentOS boxes, the password for the user is osboxes.org. Once you download the image, you create VirtualBox instance with an existing hard drive, instructions can be found in Creating a New Virtual Machine in VirtualBox tutorial. Once you do that, you have to configure the Network to Bridged Adapter.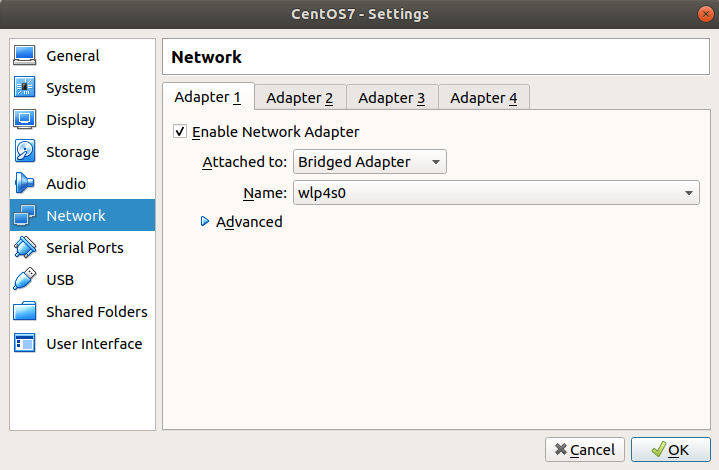
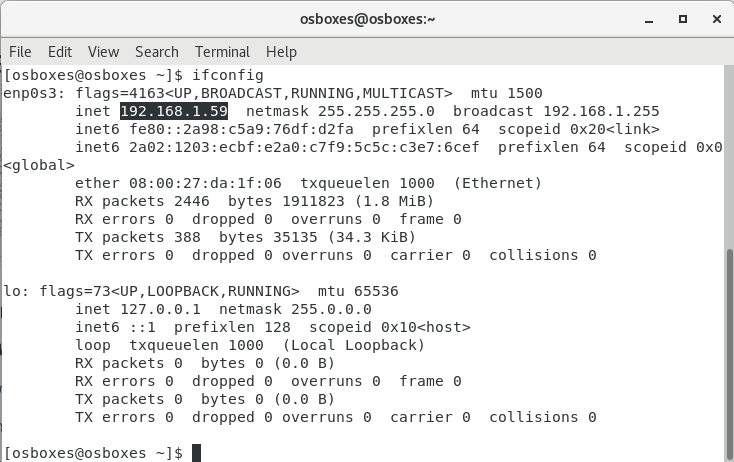
Then you login to the virtual machine and install OpenSSH. Install in with yum -y install openssh-server openssh-clients command. Start the SSH service with chkconfig sshd on and then service sshd start commands. Edit configuration with sudo vi /etc/ssh/sshd_config command and permit root login by adding PermitRootLogin yes in the config file. Note that permitting root login should never be done in a real environment, I do it here just to make our demo easier, otherwise, I would have to create a separate user with permissions, which is more effort. Finally, restart the SSH service with service sshd restart command. Full details can be found in Install and configure ssh server and client under CentOS post. Find the IP of the virtual machine by executing ifconfig command inside the box. In my case IP was 192.168.1.59, I have highlighted it in the image below and will be using it in the commands further into the post.
After you have the SSH running you are now ready to run the Ansible Playbook. Before doing that you have to add the ECDSA key fingerprint to your known_hosts, otherwise Ansible connection will fail. To do so just SSH to the virtual box from your machine with ssh root@192.168.1.59 command. You will be asked whether to continue connecting, answer with yes and then exit the SSH session.
Create hosts file with the following content:
[all]
192.168.1.59
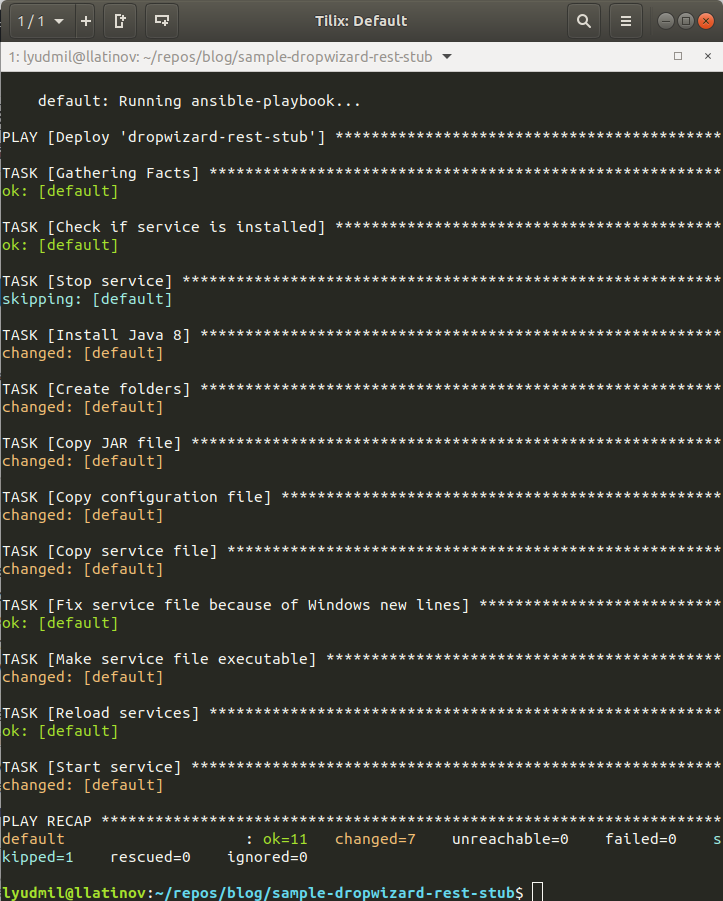
In Playbook we have defined hosts affected by this playbook with hosts: all, but this is only abstract definition, this is why you need the hosts file, which provides the actual machines matching the abstract definition. Once you have the hosts file playbook is run with:
ansible-playbook -i hosts -u root --ask-pass -e ansible_network_os=vyos playbook.yml
The command runs the playbook.yml file with user -u root and asks for password with —ask-pass. Command has a configuration passed with -e ansible_network_os=vyos, this basically sets a network protocol for Ansible to communicate with the virtual box.
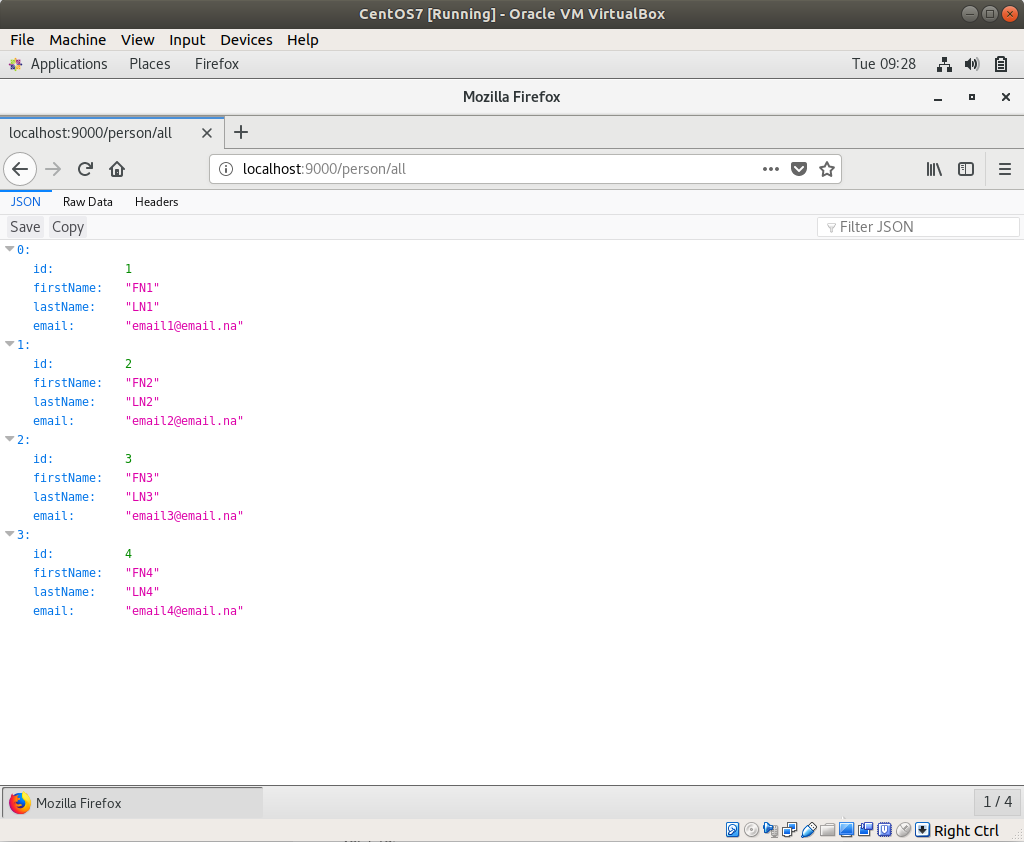
Once the playbook is executed you can log in to the virtual machine and check http://localhost:9000/person/all in the browser.
Provision into Vagrant
Vagrant is a tool for building and managing virtual machine environments in a single workflow. Vagrant provides an Ansible provisioner. There are two modes of this provisioner - ansible and ansible_local. The difference is that with ansible_local you do not need to have real Ansible installation on your host operating system. In the current example, ansible_local is used so anyone can go directly to Vagrant provisioning without the need to install Ansible. It takes some more time as Ansible should be installed on Vagrant virtual box, so if you have Ansible installed already you can switch to ansible provisioner. Vagranfile is:Vagrant.configure('2') do |config|
config.vm.hostname = 'dropwizard'
config.vm.box = 'opscode-centos-7.2'
config.vm.box_url = 'http://opscode-vm-bento.s3.amazonaws.com/vagrant/virtualbox/opscode_centos-7.2_chef-provisionerless.box'
config.vm.network :forwarded_port, guest: 9000, host: 9200
config.vm.network :forwarded_port, guest: 9001, host: 9201
config.vm.provider :virtualbox do |vb|
vb.name = 'dropwizard-rest-stub-ansible'
end
config.vm.provision :ansible_local do |ansible|
ansible.become = true
ansible.playbook = 'playbook.yml'
end
end
Guest’s port 9000 is exposed to 9200 to your host, so once you provision with Vagrant, you can check http://localhost:9200/person/all. One important piece here is ansible.become = true which basically is the analog for sudo in the normal commands.
Conclusion
Ansible is an easy way to streamline your configuration changes like deployments, infrastructure configuration, etc. In the current post, I have given an example of very simple Ansible Playbook which deploys a single JAR Java application. In order to test Ansible Playbook, it can be provisioned into Vagrant.