WPF automation - locating and structure of WinForms elements
References
This post is part of Automation of WPF applications with Telerik Testing Framework and TestStack White series. The sample application can be found in GitHub SampleApp repository.WinForms elements manipulation with TestStack White
MessageBox.cs class is a representation of a MsgBox of our sample application which is WinForms.using System.Windows.Automation;
using White.Core.UIItems;
using White.Core.UIItems.Finders;
using White.Core.UIItems.WindowItems;
namespace SampleApp.Tests.Framework.Elements
{
public class MessageBox
{
private Window win;
public MessageBox(Window window)
{
win = window;
}
private Button Button_OK
{
get
{
return win.Get<Button>(
SearchCriteria.ByControlType(ControlType.Button).
AndByText("OK"));
}
}
private Label Label_Text
{
get
{
return win.Get<Label>(
SearchCriteria.ByControlType(ControlType.Text));
}
}
public void ClickOkButton()
{
Button_OK.Click();
}
public string GetText()
{
return Label_Text.Text;
}
}
}
MessageBox is following Page Object design pattern. Elements are private properties. Actions are public methods acting on elements. Again: one element must be defined in only one place.
Constructor receives an instance of the current window object. Elements are located by White framework method:
public virtual T Get<T>(SearchCriteria searchCriteria) where T : UIItem;
SearchCriteria
SearchCriteria is used for locating elements. Search is possible with a combination of following criteria: Text, ControlType, AutomationId, NativeProperty, Framework. And here comes the hardness of working with White in complex UIs. There may be several TextBox-es (ByControlType == Edit) AND with no text inside (AndByText == ""). You can take them all and then access by index the one which is proper for your test. And what happens when you fill text in one of them. Next find has one less window. If you think it is easy then enjoy, I would rather not do it.UISpy
Finding of the proper SearchCriteria is done with powerful tool UISpy.exe. Unfortunately, this one is deprecated from Windows 8. MS have added a replacement called Inspect.exe. I don't find it useful this is why I have added UISpy.exe in the GitHub repository.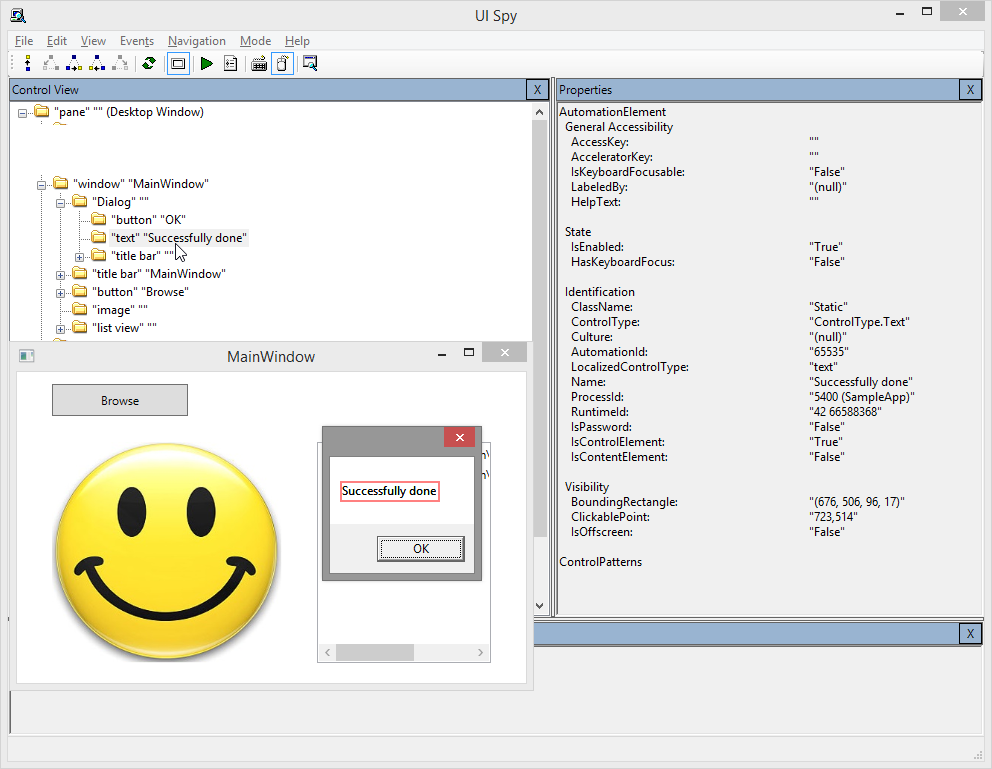
Dialog is the message box window which is a child of MainWindow. It has empty title and two elements: OK button and message text. Current example shows the location of the text element. Its MS ControlType == ControlType.Text. This is what we need to locate it since there is only one such element in the message box. Once we have it we take the text and test compares current vs. expected text. OK button is located by ControlType and text. In case of different localisations we may leave just the ControlType, but if there are more buttons text is mandatory to distinguish the correct button.
Once you have defined your page objects it is time to assemble them. Next post is WPF automation – locating and structure of WPF elements.