Advanced WPF automation – read dependency property

Last Updated on by

Post summary: What is dependency property in .NET and how to read it from Telerik Testing Framework.

In this post, I’ll show an advanced way of getting more details from an object and sophisticate your automation.

Reference

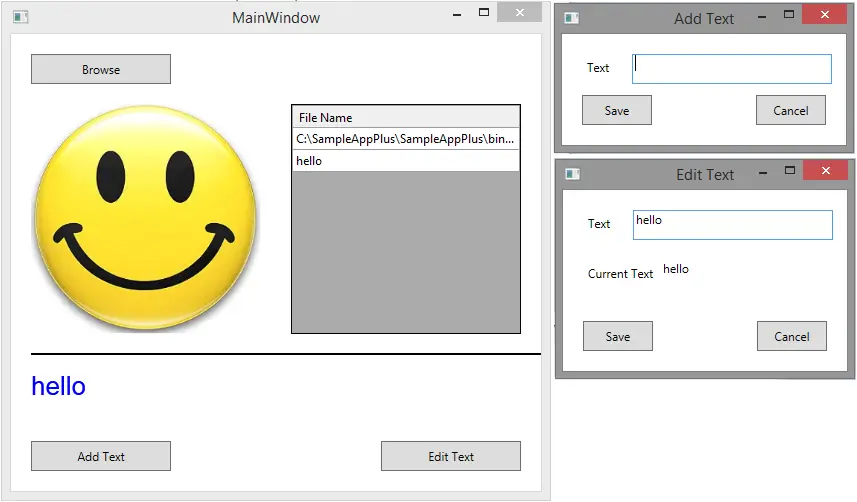
This post is part of Advanced WPF desktop automation with Telerik Testing Framework and TestStack White series. The sample application can be found in GitHub SampleAppPlus repository.

Dependency property

Dependency properties are an easy way to extend available in .NET framework functionality. In SampleAppPlus there is CustomControl defined. Purpose of this control is to store text and visualize this text as image. The text is stored in dependency property.

public partial class CustomControl : UserControl
{
	public static readonly DependencyProperty MessageProperty =
			DependencyProperty.Register("Message",
									typeof(string), typeof(CustomControl),
									new PropertyMetadata(OnChange));

	...

	public string Message
	{
		get { return (string)GetValue(MessageProperty); }
		set { SetValue(MessageProperty, value); }
	}

	...

}

Read dependency property

In order to be able to properly automate something, you have to know the internal structure of the application. Generally, you will try to locate and read the element and it will not work in the ways you are used working with elements. At this point, you have to inspect the source code of application under test and see how it is done internally. Most important if dependency property is used you should know its name. Once you know the name reading is easy.

public class MainWindow : XamlElementContainer
{
	...

	private UserControl CustomControl_Image
	{
		get
		{
			return Get<UserControl>(mainPath + "CustomControl[0]");
		}
	}

	public Verification VerifyCustomImageText(string expected)
	{
		string actual =
			CustomControl_Image.GetAttachedProperty<string>("", "Message");
		return BaseTest.VerifyText(expected, actual);
	}
}

GetAttachedProperty

GetAttachedProperty is a powerful method. Along with reading dependency properties, you can read much more. In some cases, WPF elements are nested in each other or in tooltip windows. In other cases, some object is bound to WPF element. In such situations you can try to access the elements and method will return you FrameworkElement object. From this object, you can again get GetAttachedProperty to access some class specific property. In all cases, you will need access to the application under test code to see how it is working internally.

FrameworkElement tooltip = wpfElement.
	GetAttachedProperty<FrameworkElement>("", "ToolTip");
string value = tooltip.GetAttachedProperty<string>("", "SomeSpecificProperty");

Conclusion

GetAttachedProperty is a powerful method. Once you get stuck with normal processing of elements you can always try it. I would say definitely give it a try.

Related Posts

Read more...

Advanced WPF automation – page objects inheritance

Last Updated on by

Post summary: re-use of page objects code through inheritance.

Inheritance is one of the pillars of object-oriented programming. It is a way to re-use functionality of already existing objects.

Reference

I’ve started a series with details of Advanced WPF desktop automation with Telerik Testing Framework and TestStack White. The sample application can be found in GitHub SampleAppPlus repository.

Abstract class

An abstract class is one that cannot be instantiated. An abstract class may or may not have abstract methods. If one method is marked as abstract then its containing class should also be marked as abstract. We have two similar windows with text box, save and cancel button that is shown on both of them. AddEditText class following Page Objects pattern. It is marked as abstract thought. It has an implementation of all three elements except TextBox_Text.

public abstract class AddEditText : XamlElementContainer
{
	protected string mainPath =
		"XamlPath=/Border[0]/AdornerDecorator[0]/ContentPresenter[0]/Grid[0]/";
	public AddEditText(VisualFind find) : base(find) { }

	protected abstract TextBox TextBox_Text { get; }
	private Button Button_Save
	{
		get
		{
			return Get<Button>(mainPath + "Button[0]");
		}
	}
	private Button Button_Cancel
	{
		get
		{
			return Get<Button>(mainPath + "Button[1]");
		}
	}

	public void EnterText(string text)
	{
		TextBox_Text.Clear();
		TextBox_Text.User.TypeText(text, 50);
	}

	public void ClickSaveButton()
	{
		Button_Save.User.Click();
		Thread.Sleep(500);
	}

	public void ClickCancelButton()
	{
		Button_Cancel.User.Click();
	}
}

Add Text page object

The only thing we have to do in Add Text window is to implement TextBox_Text property. All other functionality has already been implemented in AddEditText class.

public class AddText : AddEditText
{
	public static string WINDOW_NAME = "Add Text";
	public AddText(VisualFind find) : base(find) { }

	protected override TextBox TextBox_Text
	{
		get
		{
			return Get<TextBox>(mainPath + "TextBox[0]");
		}
	}
}

Edit Text page object

In Edit Text page object we have to implement “TextBox_Text” property. Also on this window, there is one more element which needs to be defined.

public class EditText : AddEditText
{
	public static string WINDOW_NAME = "Edit Text";
	public EditText(VisualFind find) : base(find) { }

	private TextBlock TextBlock_CurrentText
	{
		get
		{
			return Get<TextBlock>(mainPath + "TextBlock[0]");
		}
	}

	protected override TextBox TextBox_Text
	{
		get
		{
			return Get<TextBox>(mainPath + "TextBox[1]");
		}
	}

	public Verification VerifyCurrentText(string text)
	{
		return BaseTest.VerifyText(text, TextBlock_CurrentText.Text);
	}
}

Conclusion

Inheritance is a powerful tool. We as automation engineers should use it whenever possible.

Related Posts

Read more...

Advanced WPF desktop automation

Last Updated on by

Post summary: In this series of posts I’ll expand the examples and ideas started in Automation of WPF applications series.

Telerik Testing Framework and TestStack White are powerful tools for desktop automation. You can automate almost everything with a combination of those frameworks. This series of posts will give more details how to automate more complex applications.

Reference

Code samples are located in GitHub SampleAppPlus repository. Telerik Testing Framework requires installation as it copies lots of assemblies in GAC.

SampleAppPlusThere is SampleAppPlus which is actually a dummy application with only one purpose to be used to demonstrate automation principles. With this application, you can upload an image file. Once uploaded image is visualized. The image path is listed in a table. The image path is also visualized as an image in a custom control in the bottom of the main window. The user is able to add more text which is added to the table as long as editing already existing text. Add and edit are reflected on custom image element.

Topics

  • Page objects inheritance of similar windows
  • Working with WinForms grid
  • Windows themes and XamlPath
  • Read dependency property
  • NTestsRunner in action
  • Extension methods
  • Memory usage

Page objects inheritance

It is common to have similar windows in an application. Each window is modeled as page object in automation code. If windows are also similar in terms of internal structure it is efficient to re-use similar part and avoid duplications. Re-use is achieved with inheritance. Given SampleAppPlus application has very similar windows for adding and editing text. Code examples show how to optimize your effort and re-use what is possible to be re-used. More details can be found in Advanced WPF automation – page objects inheritance post.

Working with WinForms grid

As mentioned before Telerik Testing Framework is not very good with WinForms elements. This is the main reason to use TestStack White. It is not very likely to have WinForms elements in WPF application but in order to complete the big picture I’ve added such grid in a SampleAppPlus application. Code examples show how to manage WinForms grid. More details can be found in Advanced WPF automation – working with WinForms grid post.

Windows themes and XamlPath

In given examples elements are located with exact XamlPath find expression. This approach has a serious problem related to Windows themes. For complex user interfaces, XamlPath could be different on a different theme. Windows Classic theme sometimes produces different XamlPath in comparison with standard Windows themes. Yes, it is no more available from Windows 8 but Server editions are working only with Windows Classic theme. So one and the same tests could have differences. I couldn’t find a way to automatically detect which is current theme. The solution is to have different XamlPath for both standard and classic themes. Once you have it you can switch them manually with some configuration or you can try to automate the switch by locating element for which you know is different and save variable based on its location result.

Read dependency property

A dependency property is a way in C# to extend the standard provided functionality. It can happen in a real application that developers use such functionality. Given SampleAppPlus application has a special element with dependency property. Code examples show how to extract property value and use it in your tests. More details can be found in Advanced WPF automation – read dependency property post.

NTestsRunner in action

I’ve introduced NTestsRunner which is a custom way for running functional automated tests. Code samples show how to use it and create good tests that are run only with this tool.

Extension methods

Extension methods are one extremely good feature of .NET framework. I personally like them very much. I assume everyone writing code in C# is aware of them. Still, in code examples show how they can be used.

Memory usage

Memory is not a problem on small projects. But when the number of tests continue to grow it actually becomes a problem. More details can be found in Advanced WPF automation – memory usage post.

Related Posts

Read more...

WPF automation – locating and structure of WPF elements

Last Updated on by

Post summary: Guide how to locate WPF elements with Telerik Testing Framework.

References

This post is part of Automation of WPF applications with Telerik Testing Framework and TestStack White series. The sample application can be found in GitHub SampleApp repository.

MainWindow Page Object

MainWindow.cs class is a representation of the main window of our sample application which is WPF. Note that code here is shortened. The full code can be found in GitHub repository.

using ArtOfTest.WebAii.Controls.Xaml.Wpf;
using ArtOfTest.WebAii.Silverlight;
using ArtOfTest.WebAii.TestTemplates;
using System.Threading;

namespace SampleApp.Tests.Framework.Elements
{
	public class MainWindow : XamlElementContainer
	{
		public static string WINDOW_NAME = "MainWindow";
		private string mainPath =
			"XamlPath=/Border[0]/AdornerDecorator[0]/ContentPresenter[0]/Grid[0]/";
		public MainWindow(VisualFind find) : base(find) { }

		private Button Button_Browse
		{
			get
			{
				return Get<Button>(mainPath + "Button[0]");
			}
		}

		public void ClickBrowseButton()
		{
			Button_Browse.User.Click();
			Thread.Sleep(500);
		}
	}
}

MainWindow is following Page Object design pattern. Elements are private Properties. Actions on elements are public methods that are the actual building blocks of the tests. Do not just add action methods for the sake of adding them. Add them if only the tests need such action.

If the element is used in only one action then it could be inside the action method, but if the element is used more than one it is mandatory to keep it as separate property. The main idea is to avoid duplications in order to improve maintainability. Remember to stay DRY: one element must be defined in only one place.

MainWindow class extends XamlElementContainer which comes from the framework. The constructor takes VisualFind object and passes it to XamlElementContainer‘s constructor. This allows us to use framework’s methods for location of elements. In our case

public TControl Get<TControl>(params string[] clauses)
	where TControl : ArtOfTest.WebAii.Controls.Xaml.IFrameworkElement;

This is the strategy used by the Test Studio generated tests and I prefer it.

A different approach for MainWindow

Another element structure could be not to extend XamlElementContainer but pass a VisualFind object through MainWindow’s constructor and use it internally to locate elements.

using ArtOfTest.WebAii.Controls.Xaml.Wpf;
using ArtOfTest.WebAii.Silverlight;
using System.Threading;

namespace SampleApp.Tests.Framework.Elements
{
	public class MainWindow
	{
		public static string WINDOW_NAME = "MainWindow";
		private string mainPath =
			"XamlPath=/Border[0]/AdornerDecorator[0]/ContentPresenter[0]/Grid[0]/";
		private VisualFind visualFind;
		public MainWindow(VisualFind find)
		{
			visualFind = find;
		}

		private Button Button_Browse
		{
			get
			{
				return visualFind.ByExpression(
					new XamlFindExpression(mainPath + "Button[0]")).
					CastAs<Button>();
			}
		}

		public void ClickBrowseButton()
		{
			Button_Browse.User.Click();
			Thread.Sleep(500);
		}
	}
}

How to locate elements is described in finding page elements article.

XamlPath

As you can see I’m using exact XamlPath find expression in order to locate my elements because I find it consistent and easy to maintain. XamlPath syntax is pretty similar to XPath. The difference is its indexes are zero-based (Button[0] is the first element) and it doesn’t provide predicates and axes. The hard part is to get the XamlPath. I have found this lovely tool WPF Inspector. It gives a lot of information about the structure of WPF application.

WPF Inspector

WPF Inspector

This is a screenshot of the XamlPath for Browse button. In more complex UIs even with this great tool, it is not that easy to get the XamlPath. If you find it hard you may consider other find expressions.

All elements on MainWindow are only WPF thus an instance of White is not needed. In case of WinForms content hosted inside WPF, you can pass an instance of White through elements’ constructor and use it in actions inside.

public MainWindow(VisualFind find, Application applicationWhite) : base(find)
{
	appWhite = applicationWhite;
}

Having an instance of White inside the class you can work with it as explained in WPF automation – locating and structure of WinForms elements post.

Related Posts

Read more...

WPF automation – projects structure

Last Updated on by

Post summary: How to structure projects in the course of WPF automation.

References

This post is part of Automation of WPF applications with Telerik Testing Framework and TestStack White series. The sample application can be found in GitHub SampleApp repository.

Overview

For better maintainability and good design, automation testing is separated into two projects. One is the so-called framework project. It has knowledge about third used party frameworks (Telerik Testing Framework, TestStack White, Selenium, Watij, etc.). It operates on elements via those third-party frameworks. Framework exposes actions that are building blocks of the tests. The other project is the tests. It doesn’t know anything about used automation frameworks. It uses methods exposed by an internal framework and builds the tests with them. The idea is that one team/person with development knowledge can be responsible for the internal framework, others can be responsible for writing well-designed tests using the internal framework only. Another benefit of two projects is the ability to completely change internal framework project without affecting test logic at all. Here is the structure of my sample projects:

Projects structure

Projects structure

SampleApp – This is the application under test. Generally, it is not in the test project, you receive it from developers or from nightly build or from some other place. For the purpose of this demo, I’ve created a very basic application that uploads an image and shows it inside. There is attached image (HappyFace.jpg) that is used in the tests.

SampleApp.Tests – Here is the most important artifact – the tests, the purpose of all this fuss. In the demo, this is made as UnitTest with MS Unit Testing Framework. You can use whatever run strategy you like – another unit testing framework (xUnit, nUnit, etc.) or you can build your own tests runner. I have built my own tests running because by definition unit tests should be independent of each other thus MS Unit Testing Framework runs them in random order. It might be possible to manage order, but this will require managing of some sort of external files. It gives too much overhead to me.

SampleApp.Tests.Framework – This is where the interesting part is. Here are the elements – main application form (WPF), message boxes shown on success or error (WinForms) and open file dialogue (WinForms). MainWindow is manipulated with Telerik Testing Framework, other two are manipulated with White. App.cs is a holder which represent application itself and elements are accessible through it. BaseTest holds an instance of App. It is extended by UnitTests and App and its elements are accessible.

Next post is WPF automation – locating and structure of WPF elements in the code.

Related Posts

Read more...

Automation of WPF applications

Last Updated on by

Post summary: Overview how to successfully automate WPF application with Telerik Testing Framework and TestStack White.

I’ve spent lots of time in automation of a WPF application. Nowadays the world is dealing with web application and desktop application are fading away. Nevertheless, desktop applications still have their own private space and I hope these series of posts will be useful to someone.

Preface

An application under test is created with WPF but has WinForms grids included on different windows presenting lots of information. Performance is the main reason to use WinForms grids inside a WPF application. WPF grid with 40 columns and 100 rows lags a lot. After research and proof of concept of commercial and open source tools and frameworks, two were chosen: Telerik Testing Framework and TestStack White. They provide flexibility and maintainability which is so vital in a fast-changing application. Both are used with C#. Every one has its own weaknesses and strengths but both made a perfect synergy to provide you the possibility to automate almost everything.

Telerik Testing Framework

Extremely powerful and free to use framework. You can purchase additional support which is at reasonable prices. Telerik also provides Test Studio, a tool and MS Visual Studio plug-in, build on top of the framework. This is also an option, but for me using a tool gives more restrictions than benefits. Their framework is the best available for testing WPF applications. It is very easy to use. Elements are easily located by XamlPath (very similar to XPath). Of course, there are other locate options. The framework provides very rich API with lots of operations over the elements. Still, its powerfulness is limited to WPF. It is not that good with WinForms elements. Telerik Testing Framework requires installation as it copies lots of assemblies in GAC.

TestStack White

Extremely powerful open source framework. Build as a wrapper of Microsoft UI Automation framework you can automate almost everything with it. But this comes at a price. It is hard to locate elements. I use it only where Telerik Testing Framework is not capable to do the work – WinForm grids, context menus, closing windows with small X in the top right corner?! Yes, those are WPF inside but are hosted in operation system window and Telerik has no access to it.

In GitHub, I have uploaded an MS Visual Studio 2013 project with very simple application taken from this example. I have added very basic tests to it to illustrate how it is done. With upcoming posts, I’ll explain in details the idea and implementation.

Below is a list of posts included in the series:

  1. Introduction (current post)
  2. WPF automation – projects structure
  3. WPF automation – locating and structure of WPF elements
  4. WPF automation – locating and structure of WinForms elements
  5. WPF automation – using the elements
  6. WPF automation – running the tests

Related Posts

Read more...